Sail Panel Installation 71 72 73 Mustang Fastback
![Sail Panels Installation 71 72 73 Mustang Fastback](https://restorationmustang.com/wp-content/uploads/2018/07/sail-panels-installation-71-72-73-mustang-5.jpg)
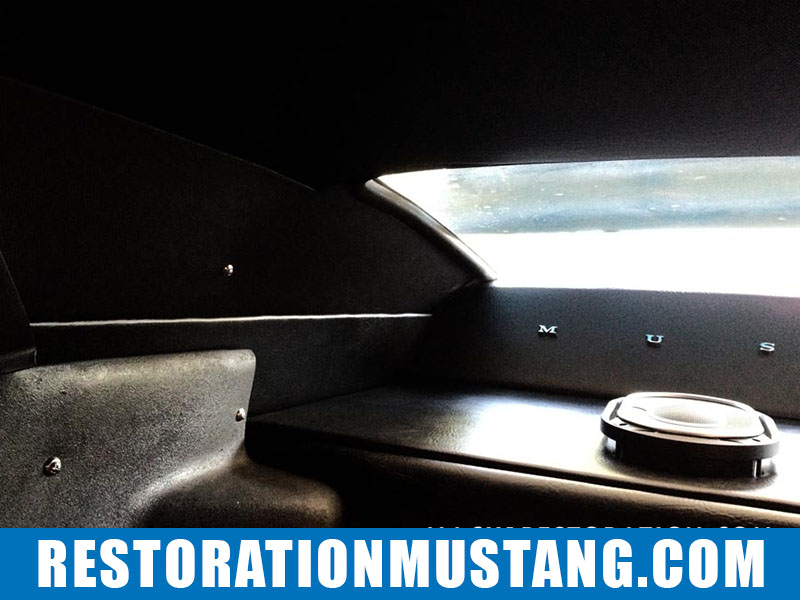
The sail panels for the Mustang have arrived from CJ Pony Parts and are of exceptional quality. Although I was able to purchase the upper sail panels, the lower sail panels or lower quarter covers are unavailable for purchase, so I had to fabricate them from scratch. All things considered, I’d say they came out pretty good. […]
Making an upper package tray cover on the Mustang Fastback 71 72 73
![Making an upper package tray upholstered for the 71 72 73 Mustang Fastback](https://restorationmustang.com/wp-content/uploads/2018/07/making-a-package-tray-upper-panel-upholstered-71-72-73-mustang-fastback-21.jpg)
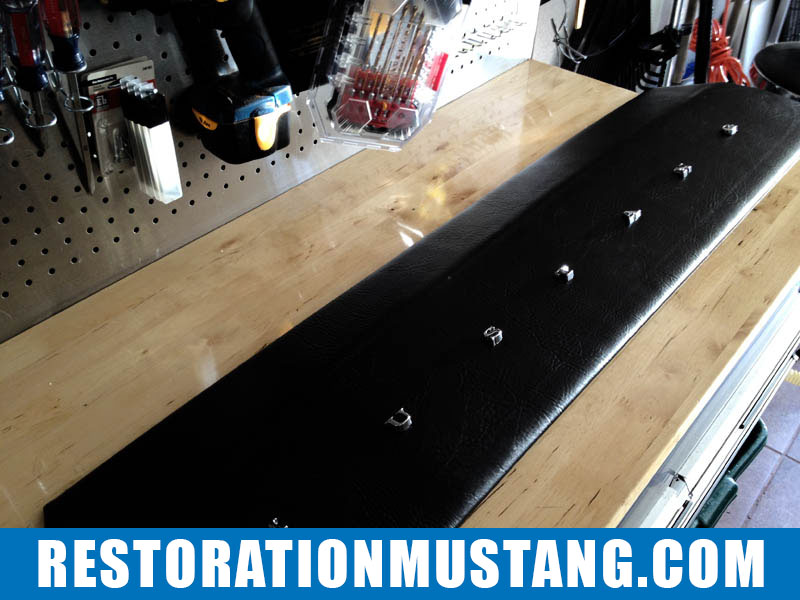
Making an upper package tray cover on the Mustang Fastback 71 72 73. Thanks to Don at Ohio Mustang Supply, I was able to snag an old upper package tray metal cover to make a template for my new upholstered tray cover. This was a simple process that was fairly easy to do and makes […]
Installing Polk Audio DXI525 Speakers into MP Products Kick Panels 71 72 73 Mustang
![Installing Polk Audio DXI525 Speakers into MP Products Kick Panels 71 72 73 Mustang](https://restorationmustang.com/wp-content/uploads/2018/07/polk-audio-dx1525-speakers-instlalled-in-mp-products-kick-panels-mustang-19.jpg)
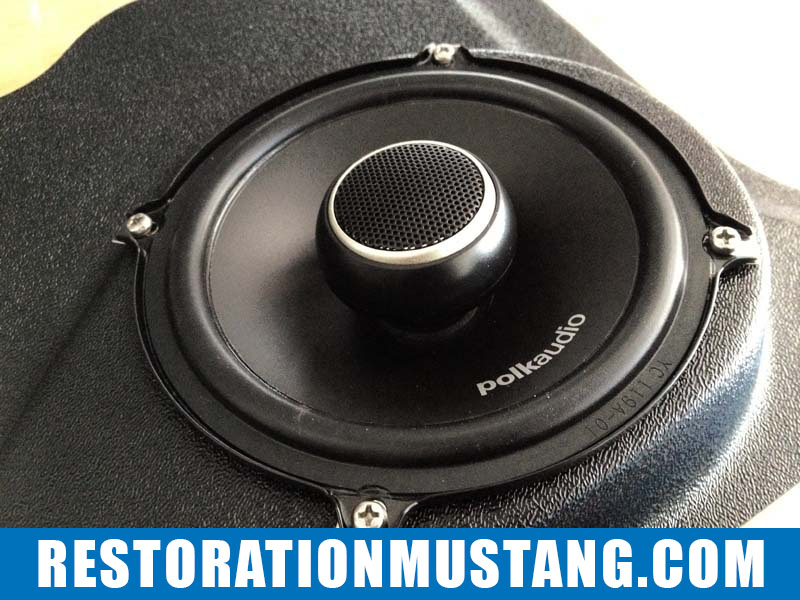
Installing Polk Audio DXI525 Speakers into MP Products Kick Panels 71 72 73 Mustang. I am happy to announce that the installation of the new Polk Audio DXI525 Speakers went flawlessly. They were installed into the MP Products Re-Manufactured speaker-podded kick panels for the 71-73 Ford Mustang. These kick panels are tough and durable. The […]
Adding upholstery vinyl to the package tray 71 72 73 mustang fastback | Upholstering the package tray how to
![Upholstering package tray adding vinyl 71 72 73 mustang fastback](https://restorationmustang.com/wp-content/uploads/2018/07/upholstering-package-tray-vinyl-71-72-73-ford-mustang-fastback-6.jpg)
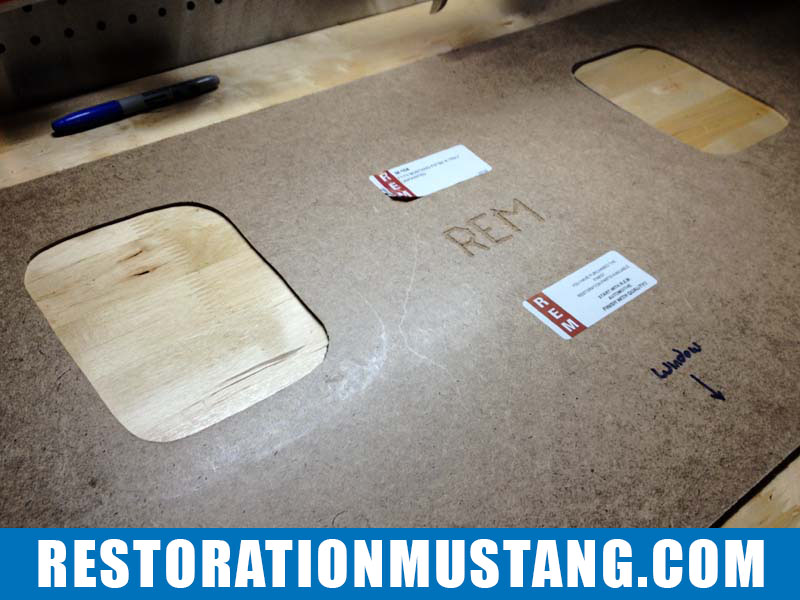
I added the vinyl upholstery to the base package tray of the 72 Mustang Fastback. This makes for a much cleaner appearance and adds a hint of texture to the rear area of the Mustang fastback. In my previous post, I talked about where I obtained the new package tray board and checked for dry fitment. I took a trip […]
Head light switch bezel retaining nut and washer | Fitting a 70 mustang switch bezel on a 71 72 or 73 Ford Mustang
![Head light switch bezel retaining nut and washer | Fitting a 70 mustang switch bezel on a 71 72 or 73 Ford Mustang. This seems to be a topic affecting a lot of fellow mustang restorers out there. Currently, the aftermarket does not remanufacture switch bezels for the 71-73 mustangs. The do however make them for the 69-70 mustang and at first glance they look similar. They couldn’t be less compatible with the 71-73 if they tried… The first problem you will need to correct is the tabs that come supplied on the bezels. These will need to be ground off of the bezel. Next, be certain that you do not mess up your original bezel retaining nuts, these are impossible to find on the aftermarket and are essential for this project to be a success. For my project mustang, I simply sanded these town to a smooth finish and sprayed mine satin black. It makes for a cleaner appearence and lets the bezels really shine in the dash panel. Moderate Install DifficultyOnce all the bezels are ground down and lay flat at the back, you will notice that the headlight switch bezel retaining nut’s head is too small to fit into the new headlight switch bezel. This does not seem like a huge problem, but it is… You will need to head over to northern tool supply or get online and find a machine bushing that measures 5/8 x 1 x 18ga. This is the perfect size to fit into the new bezel and provide a nice surface for the bezel retaining nut to attach. Your next dilemma will be that with the new setup, your bezel retaining nut is about 1/4″ too short to re-thread into the headlight switch once the back spacer is placed between the switch and the inside of the dash frame. I tried numerous solutions to solve this problem, but the angle of the dash panel is too odd for the switch to tighten down properly. The solution is to recess the face of the back spacer approx 1/4″ so that the switch becomes closer to the bezel retaining nut. To do so, I simply hit it gently with a mallet to recess inward. There are better methods to do this, but this does work just fine. The last issue you will run into is that the new headlight switch knob and stem for the 69-70 mustang is 1/2″ too short to make contact inside the headlight switch. You will need to gently pull the knob off of the new stem and refurbish your original headlight switch stem. Once you do all of this, viola! The setup looks new and fancy!](https://restorationmustang.com/wp-content/uploads/2018/07/70-71-72-73-ford-mustang-headlight-switch-bezel-retaining-nut-washer-fitment-10.jpg)
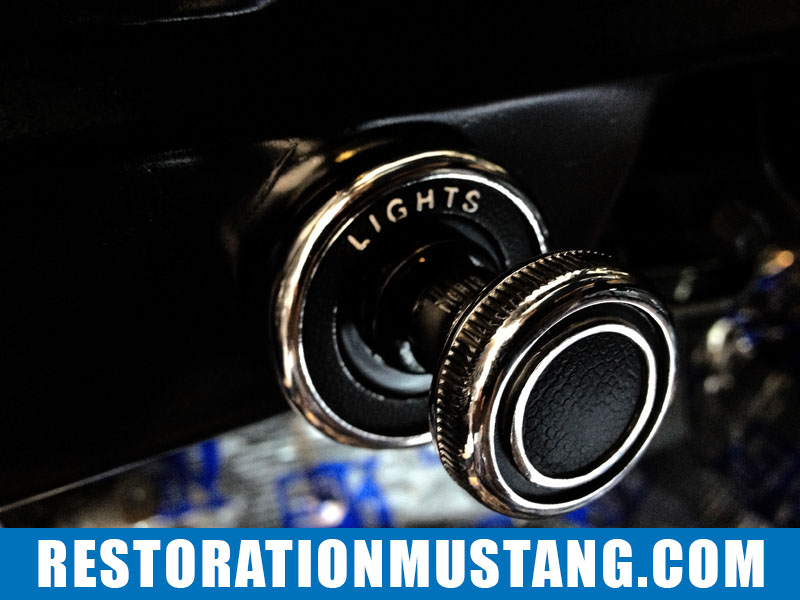
Headlight switch bezel retaining nut and washer | Fitting a 70 mustang switch bezel on a 71 72 or 73 Ford Mustang. This seems to be a topic affecting a lot of fellow Mustang restorers out there. Currently, the aftermarket does not remanufacture switch bezels for the 71-73 Mustangs. The do however make them for the […]